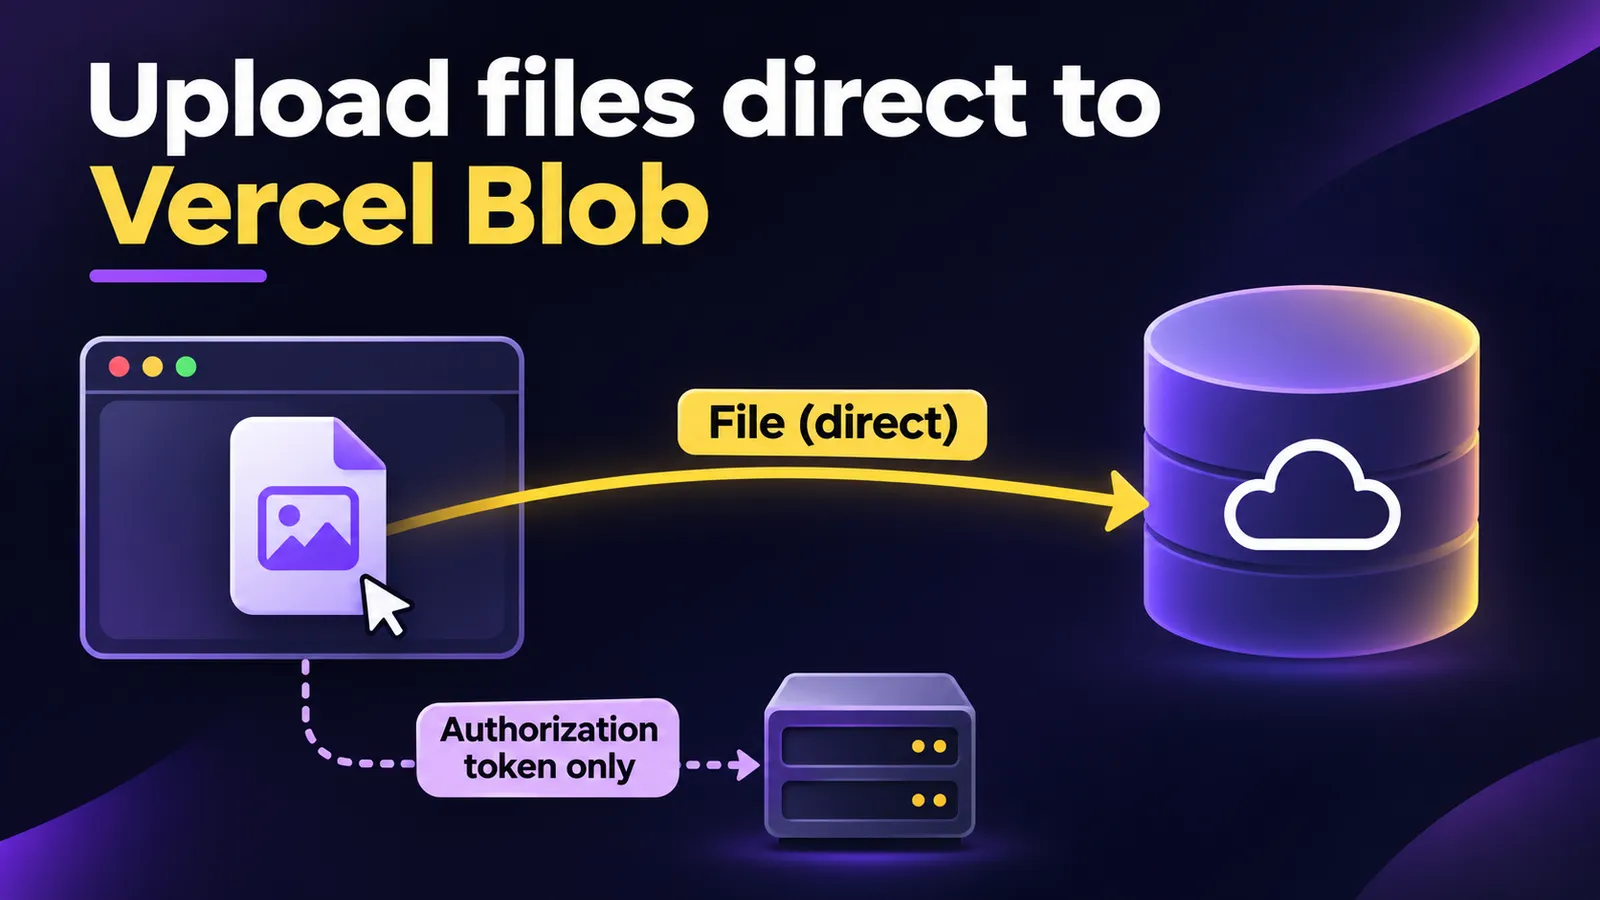
A founder asks sellers to upload 30 MiB product photos. Sending each file through a Next.js server route can hit a Function request limit, even with Vercel's new 20 MiB beta. Vercel Blob client uploads take a different path: your server checks the user and issues a short-lived upload token, while the browser sends the file bytes directly to storage. This is an implementation guide for an existing feature, not another launch announcement.
Choose the right path
Direct upload fits images, customer files, and exports that do not need to pass through your Function. If a smaller file needs immediate server-side processing, the 20 MiB Function beta may be simpler. For a 30 MiB photo, direct upload avoids putting that body in the Function request. Vercel documents Blob on all plans and a 5 TB maximum file size; it recommends multipart uploads above 100 MB. Those ceilings do not guarantee that a browser, connection, or account will finish a huge upload. Test your actual workload.
Set up the project
- Create a Blob store under Storage and connect it to your project. Use public access for product photos only if a URL accessible to anyone who knows it is acceptable. For private customer documents, select a private store and design the read path accordingly.
- Add the store's read-write token environment variable to the server connection. Vercel uses it to mint client upload tokens. Never expose that secret to browser code. Connect Preview and, if needed, Development.
- Install the SDK with
npm i @vercel/blob. The snippets below assume a Next.js App Router project with Auth.js already configured at@/auth.
Authorize without receiving the file
Create app/api/product-photos/upload/route.ts. handleUpload handles both the token exchange and the completion callback. Check the session before generating the token. Replace the auth import if your application uses another identity provider, and verify that the user can upload for the specific product.
import { handleUpload, type HandleUploadBody } from '@vercel/blob/client';
import { auth } from '@/auth';

export async function POST(request: Request) {
  const body = (await request.json()) as HandleUploadBody;
  try {
    const result = await handleUpload({
      body,
      request,
      onBeforeGenerateToken: async (pathname) => {
        const session = await auth();
        if (!session?.user?.email) throw new Error('Unauthorized');
        if (!pathname.startsWith('product-photos/')) {
          throw new Error('Invalid path');
        }
        return {
          allowedContentTypes: ['image/jpeg', 'image/png', 'image/webp'],
          addRandomSuffix: true,
          tokenPayload: JSON.stringify({ userEmail: session.user.email }),
        };
      },
      onUploadCompleted: async ({ blob, tokenPayload }) => {
        // Validate tokenPayload and save blob.url for an authorized product.
        // Never trust a client-supplied productId without checking ownership.
        console.log('Upload completed', blob.url, tokenPayload);
      },
    });
    return Response.json(result);
  } catch (error) {
    return Response.json({ error: (error as Error).message }, { status: 400 });
  }
}
The console.log shows where persistence belongs; it does not save data. Before production, check product ownership, validate the actual file type after upload, save the URL reliably, and decide how to clean up orphaned objects. If you need a strict size policy, enforce it in the upload flow and verify the SDK and store limits; an HTML file input is not a security boundary.
Send bytes from the browser
In a client component, import upload. Its token endpoint matches the server route above. The large file goes to Blob, while the Function handles authorization and the completion event.
'use client';
import { upload } from '@vercel/blob/client';
import { useState } from 'react';

export default function ProductPhotoUpload() {
  const [status, setStatus] = useState('');
  return <form onSubmit={async (event) => {
    event.preventDefault();
    const input = event.currentTarget.elements.namedItem('photo') as HTMLInputElement;
    const file = input.files?.[0];
    if (!file) return;
    setStatus('Uploading…');
    try {
      const blob = await upload(`product-photos/${file.name}`, file, {
        access: 'public',
        handleUploadUrl: '/api/product-photos/upload',
      });
      setStatus(`Done: ${blob.url}`);
    } catch (error) { setStatus(`Error: ${(error as Error).message}`); }
  }}>
    <input name="photo" type="file" accept="image/jpeg,image/png,image/webp" required />
    <button type="submit">Upload photo</button>
    <p role="status">{status}</p>
  </form>;
}
Test and understand the limits
Deploy to Preview first. Upload one small image and one around 30 MiB. In the browser Network panel, confirm the large body goes to Blob and your API exchanges only the token. Try again signed out: it must refuse to mint a token. Test a rejected content type and confirm that the completion callback records the URL once. Vercel notes that onUploadCompleted cannot reach localhost; use Preview or a tunnel with VERCEL_BLOB_CALLBACK_URL for local callback tests.
Review current pricing and limits before moving traffic. Direct upload avoids passing bytes through your Function, but Blob still charges for storage, operations, and outgoing transfer under your plan. We have not deployed this example to a Vercel account or measured cost or speed. Your decision: if files are too large for a comfortable Function request and do not need server-side processing in transit, pilot direct upload in Preview with real authentication and a representative sample.